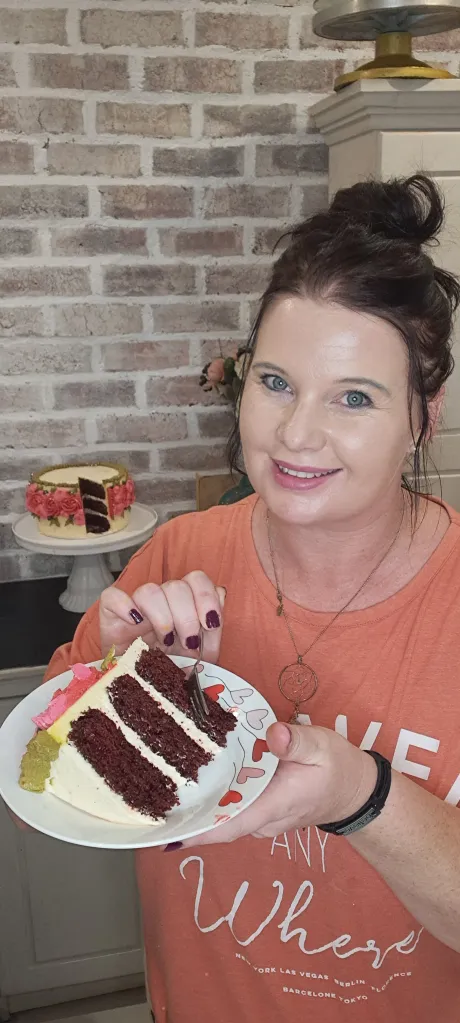
Baked and Shared by Yolandie Olech
Red velvet cake has always been one of my most requested cake flavors. Paired with cream cheese frosting, this recipe creates a soft, rich cake that works beautifully for birthdays, celebrations, or simply a comforting homemade bake
Now this has been on my list of baking and sharing the best recipe for you all to try and home but to be honest it was also a challenge to me too, as Red Velvet is not my favorite taste, I almost found it a bit dull, besides the tang of cream cheese and the bright red color of cause. That said, I also know really well how taste for each person are so different than the next so this recipe what a must, even tho it might not be my absolute favorite, I still was determent to make and share with you the best recipe ever!
The recipe I used to bake, I honestly could not find and remember it also had coffee inside, which was a good recipe but so soft, stacking it was out of the question so I knew this cake I wanted moist but also stack able.

Before we just jump into baking the recipe, let me give you a bit of insight into Red Velvet cakes and also this exact one. Some things just help knowing for the…well knowing of it I guess lol
Butter vs Oil vs Sour cream?
Normally one would use butter or oil in these cakes but lately I have figured out that Sour Cream of all things, can really help with having a moist cake too! and also some Buttermilk – I added some buttermilk to the recipe to help add moisture. Like sour cream, this acidic ingredient helps to tenderize the gluten in the flour, which gives our baked goods a softer texture and more volume.
Red Food Coloring
When you make a red velvet cake, you expect it to have that gorgeous, deep red color when you cut in. I’ve found that it’s a lot easier to achieve that result using gel food coloring. Liquid works too but be careful not to add too much and end up changing the structure of the cake with having too much liquid.
Cream Cheese Frosting:
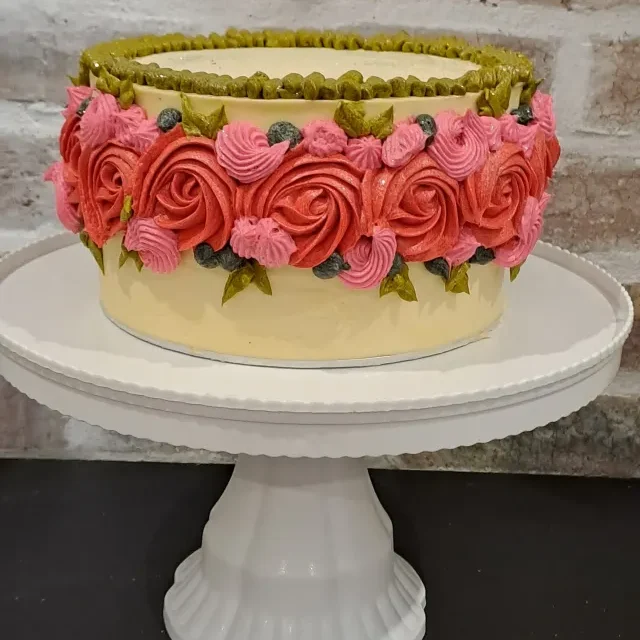
This recipe can really take about any frosting to be honest but I wanted to stick with that tangy flavor cream cheese gives you. Full cream is best but also hard to find and expensive so medium fat worked just as well here. Just a little note, please make one and an half batch of frosting if you want to add decor like I did to my cake. One single batch covers and fills but I had to make more to decorate the flower arrangement with.
Assembling and Decorating This Cake
While I had this whole Idea in my mind to decorate this cake in a way one could easily just know this was a Red Velvet by the crumbs I plan to take off the tops and crumble up and decorate the sides over the frosting with, I had to quickly decide on something else as the cake came out perfectly baked and totally flat which doesn’t always happen in the cake world. So that is where I went to my Instagram to ask some help in my stories, with them saying I had to use black, red and pink, I had no longer any doubts of what I wanted to do. Red and Pink Flowers all the way!
As for the stacking there was no weird or strange ways of cutting or crafting out of the cake to make it another shape as the normal round I baked it in.
So it was one layer after the other with some cream cheese frosting everywhere you didn’t have cake! This is something totally of your own thoughts and creative mind, but you can keep this very simple by just adding some frosting and then decorating with a spoon or fork, totally what my mom used to do by the way!

Tips for the Making the Best Red Velvet Cake:
- Ingredients: Try to take out or leave out your ingredients so they are at room temperature, it helps so much when you need all of them to incorporate “rightly” together.
- Weighing and Measuring: When you measure your flour and don’t have a kitchen scale to use the best is to scoop your flour into the measuring cup with a spoon to make sure all those open pockets are full.
- Mix the cake batter just until the ingredients are incorporated once you add in the flour. This will ensure your cake layers are tender and fluffy.
- Batter weighing: How ever weird you may think this is, I love weighing my mixing bowl before I mix the batter together and then weigh it after I mixed everything to work out how many batters go into each tin. I love it when I cut into a cake and my layers are the same size, I realize this is an extra step that might just take time, for myself it is absolutely worth it!
- Use full fat cream cheese that comes in a brick. It will give the frosting the best consistency. But here in South Africa we mostly find the medium fat in stores which is totally fine to use too.
- Chill the cake layers in the freezer for about 30 minutes before assembling the cake. It makes it so much easier to stack and frost them! You can even wrap them up in cling wrap 5minutes after you take them out of the oven, put them in the freezer and decorate the next day if you so wish, just take them out about an hour before you want to start.
- Use gel or powder food coloring to create brightly colored cake layers. It works best because it doesn’t throw off the consistency of the batter or give it a bitter taste, you can also use red velvet powder but gosh it loves to stain everything hehe, but also gives a beautiful red deep color.
Time To Get This Cake Baked!!
This is what you will need:

- 300g All Purpose Flour (2+1/4 Cup)
- 25g Cocoa Powder (1/3 Cup)
- 1 Teaspoon Salt
- 1+1/2 Teaspoon Baking Powder
- 1+1/2 Teaspoon Baking Soda
- 300g Brown Sugar ( 1+1/2 Cups)
- 2 Large Eggs
- 375ml Buttermilk(1+1/2 Cups)
- 60ml Sour Cream (1/4 Cup)
- 1 Teaspoon White Wine Vinegar
- 1 Table Spoon Red Velvet Powder or Gel Color
For The Cream Cheese Frosting:
If you only want a filling and maybe a crumb coat use the below amount of frosting, if you want to decorate like I did you might have to make the frosting one and a half batch to make sure you have enough.
- 340g Salted Butter
- 120g Full or Medium Fat Creamed Cheese
- 1 Teaspoon Salt
- 1 Teaspoon Vanilla
- 900g Icing Sugar
- Optional (1-2 Tablespoon Full Cream Milk or Even Cream)
Let’s Throw This Together:


Step1:
Prepare your cake tins by adding a layer of non stick cooking spray inside of your tins. If you do happen to keep baking paper (which I suggest you do) cut out the size of the tin by measuring the bottom to the paper and place one layer in the tin. Spray the paper lightly too, this really helps to make sure your cake does not stick.


Step2 : Add together your sugar and eggs and mix really well until light and fluffy


Step3 : While the eggs and sugar mix together, lets sift the flour, cocoa powder, baking powder , and salt together. Basically all your dry ingredients and put them aside for a second


Step4: To our sugar and egg mixture, add the buttermilk and sour cream and slowly mix together


Step5: Time to add the color powder or gel, baking soda and the white wine vinegar and mix slowly together until incorporated.
Step6 : Now that the batter is ready we are going to divide them into our 3 prepared tins. Bake them for 25min at 175 degrees Celsius in our pre heated oven.
While the cake is baking. Let’s make our frosting:


This next part is pretty easy to bring together, remember this amount is enough to crumb coat and cover our cake. If you want to add beautiful piping decorations like mine, make a half batch frosting extra.
Start by adding the butter and cream cheese together in the mixing bowl. Start whipping until both are nice and smooth, continue adding the salt and vanilla and maybe a table spoon milk or cream. Cream cheese is pretty soft so in summer I would not add too much liquid until you really see its needed.
Whip until light and fluffy.

In between mixing it is always good to stop and scrap down that sides.
I made a video for you that shows and explain everything. You can go watch it here:
To Assemble The Cake:
- Place a little frosting on your board for the first layer to be pressed on, that acts like glue, so your cake won’t slide off.
- Place the first layer and top it with a thick layer of our frosting.
- Make sure the frosting is layered on Everly, then add the second layer and another thick layer of frosting
- Place the last layer on top, choosimg your flattest side to show towards the roof. Now you will ensure an even flat cake at the top.
- Start by adding a first thin layer of frosting all around the cake so we can fill the gaps and keep those Crumbs inplace.
- Once covered, place in your fridge for 20min to settle and set.
- Put the second layer of frosting on very generously and smooth out if you desire.
- Decorations is all up to you now.

Don’t be afraid to go crazy with decorating, you just baked a red velvet cake, you deserve to have some fun now!
I really hope you enjoy making and maybe decorating this cake as much as I had and I am so exited to share the full video of how I stacked and Decorated this cake with you very soon.
If You have any questions let me know in the comments below and remember to tag me #yolandieolech on all your creations as I would love to see them.
Keep Yourself Safe, Happy and Blessed Friends. See you in the next one.
I hope this red velvet recipe becomes one of your favorites too 🌸
Thank you for baking along with me.
All My Love
Yolandie Olech